
Setting up online booking for a nail salon comes down to four things: what you offer, who performs it, when they're available, and the rules around booking it. Once those are in place, clients can book you directly from your Nailterest profile or a shareable link, with no phone tag and no double-booked chairs.
What you'll set up
- Employees: your team, so clients can pick the person they want
- Services: what you offer, with a price, a duration, and who can perform it
- Availability: working hours per employee, plus time off
- Settings: notice period, how far ahead clients can book, cancellation cutoff, and whether bookings need your approval
- Google Calendar (optional): one calendar per employee, kept in sync with their bookings
The screenshots below walk through a demo salon, Luna Nail Studio, setting this up for the first time. Your dashboard looks exactly the same, just with your own services and team.
Step 1: Add your employees
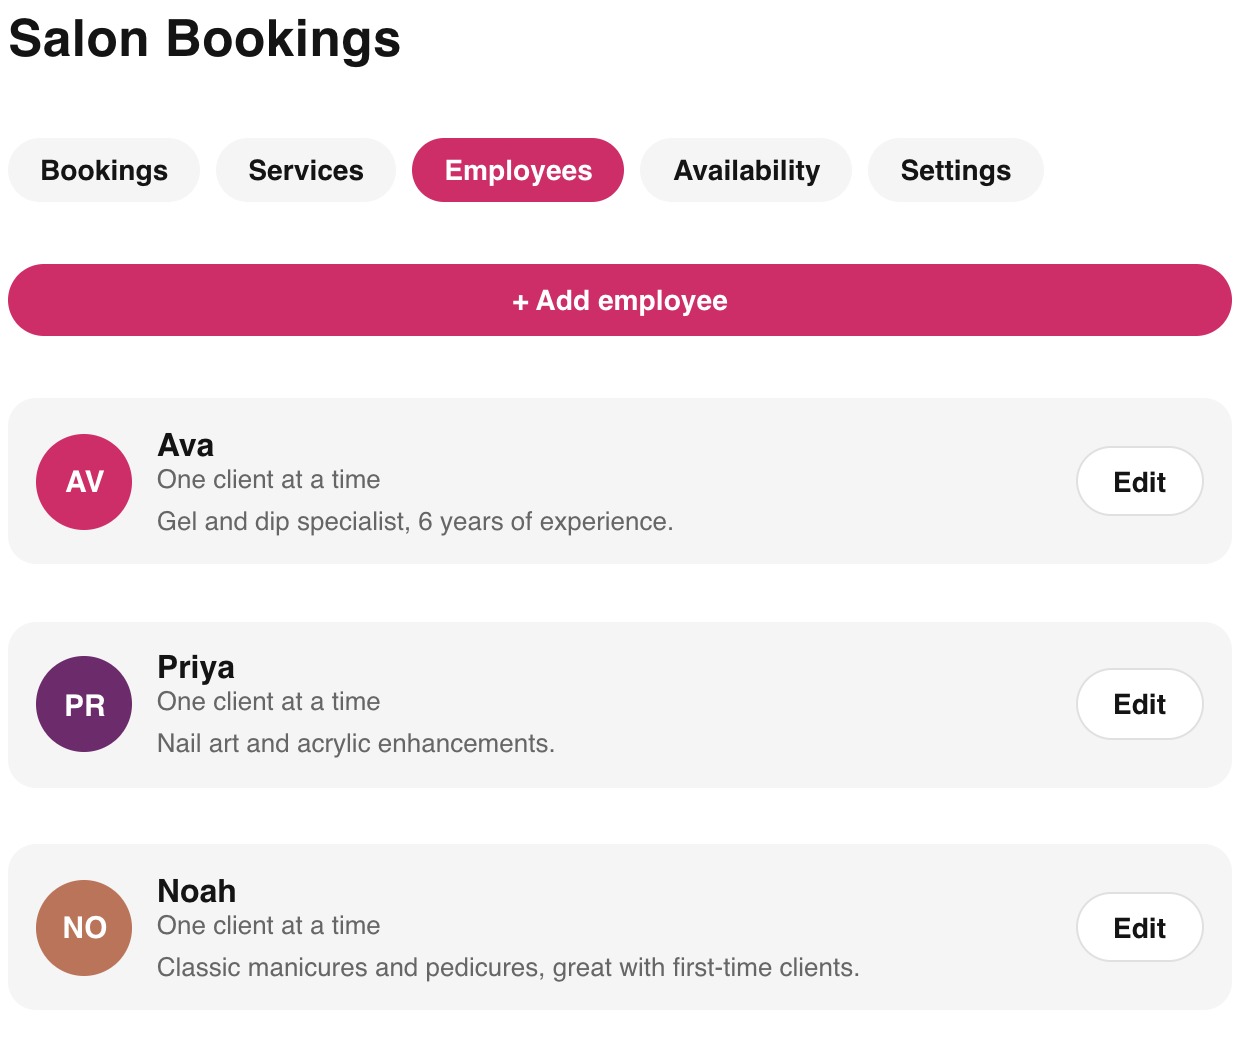
- 1Add each team member
A name and a photo are enough to start; a short bio helps clients choose when they don't have a preference yet.
- 2Set how many clients they can take per slot
Most solo nail services are one client at a time. Group settings (like a nail art class) can allow more.
Step 2: Add your services
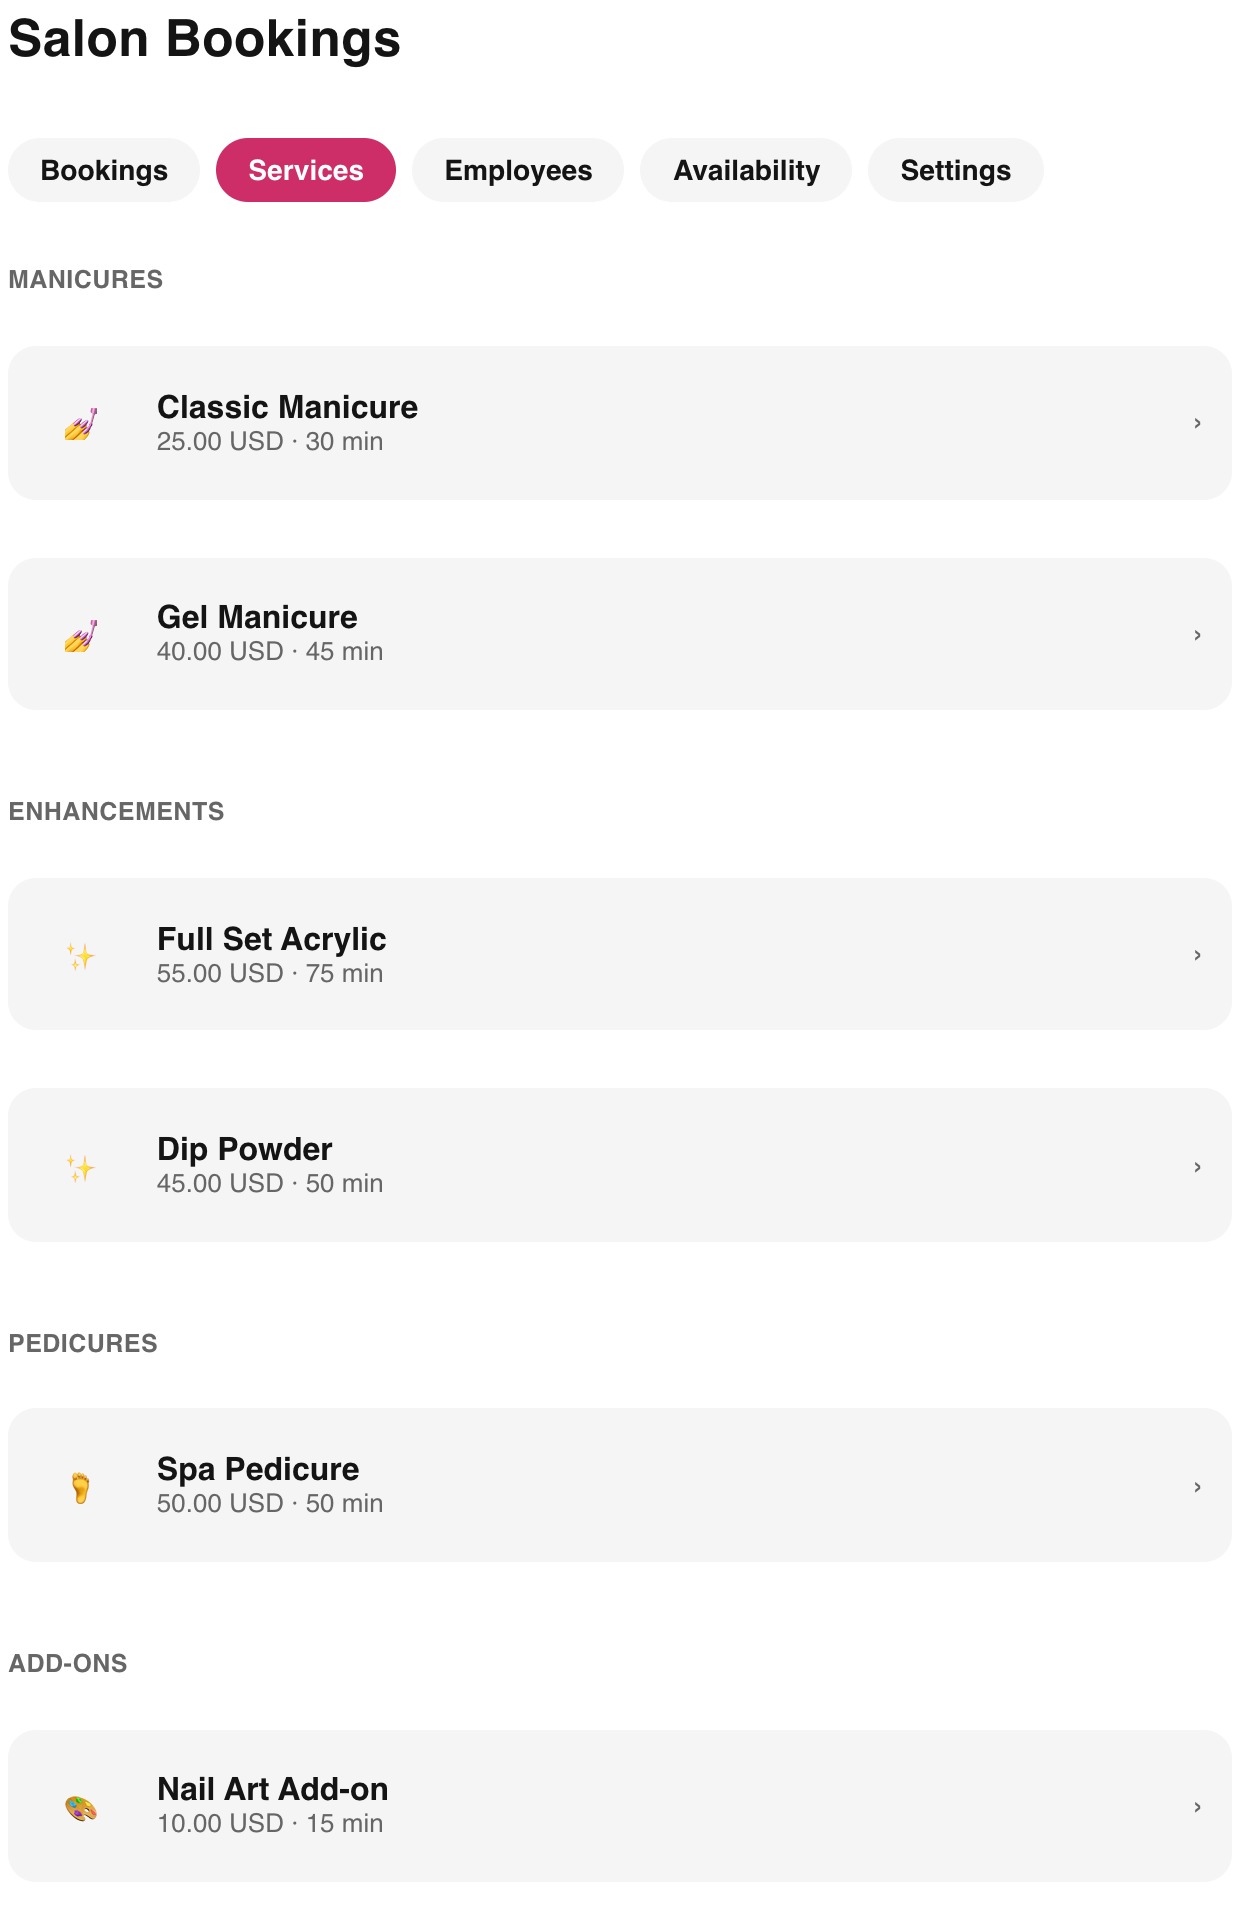
- 1Open the Services tab and add a service
Give it a name clients will recognize, like "Gel Manicure" or "Full Set Acrylic", not an internal shorthand.
- 2Set the price and duration
Duration is what actually blocks time on the calendar, so round up rather than down if a service sometimes runs long.
- 3Add a category and a photo
Categories group services on your public booking page (Manicures, Pedicures, Add-ons); a photo helps clients pick with confidence.
- 4Choose who performs it
Assign it to the employees you just added, so clients can't book someone who doesn't do it.
Step 3: Set your availability
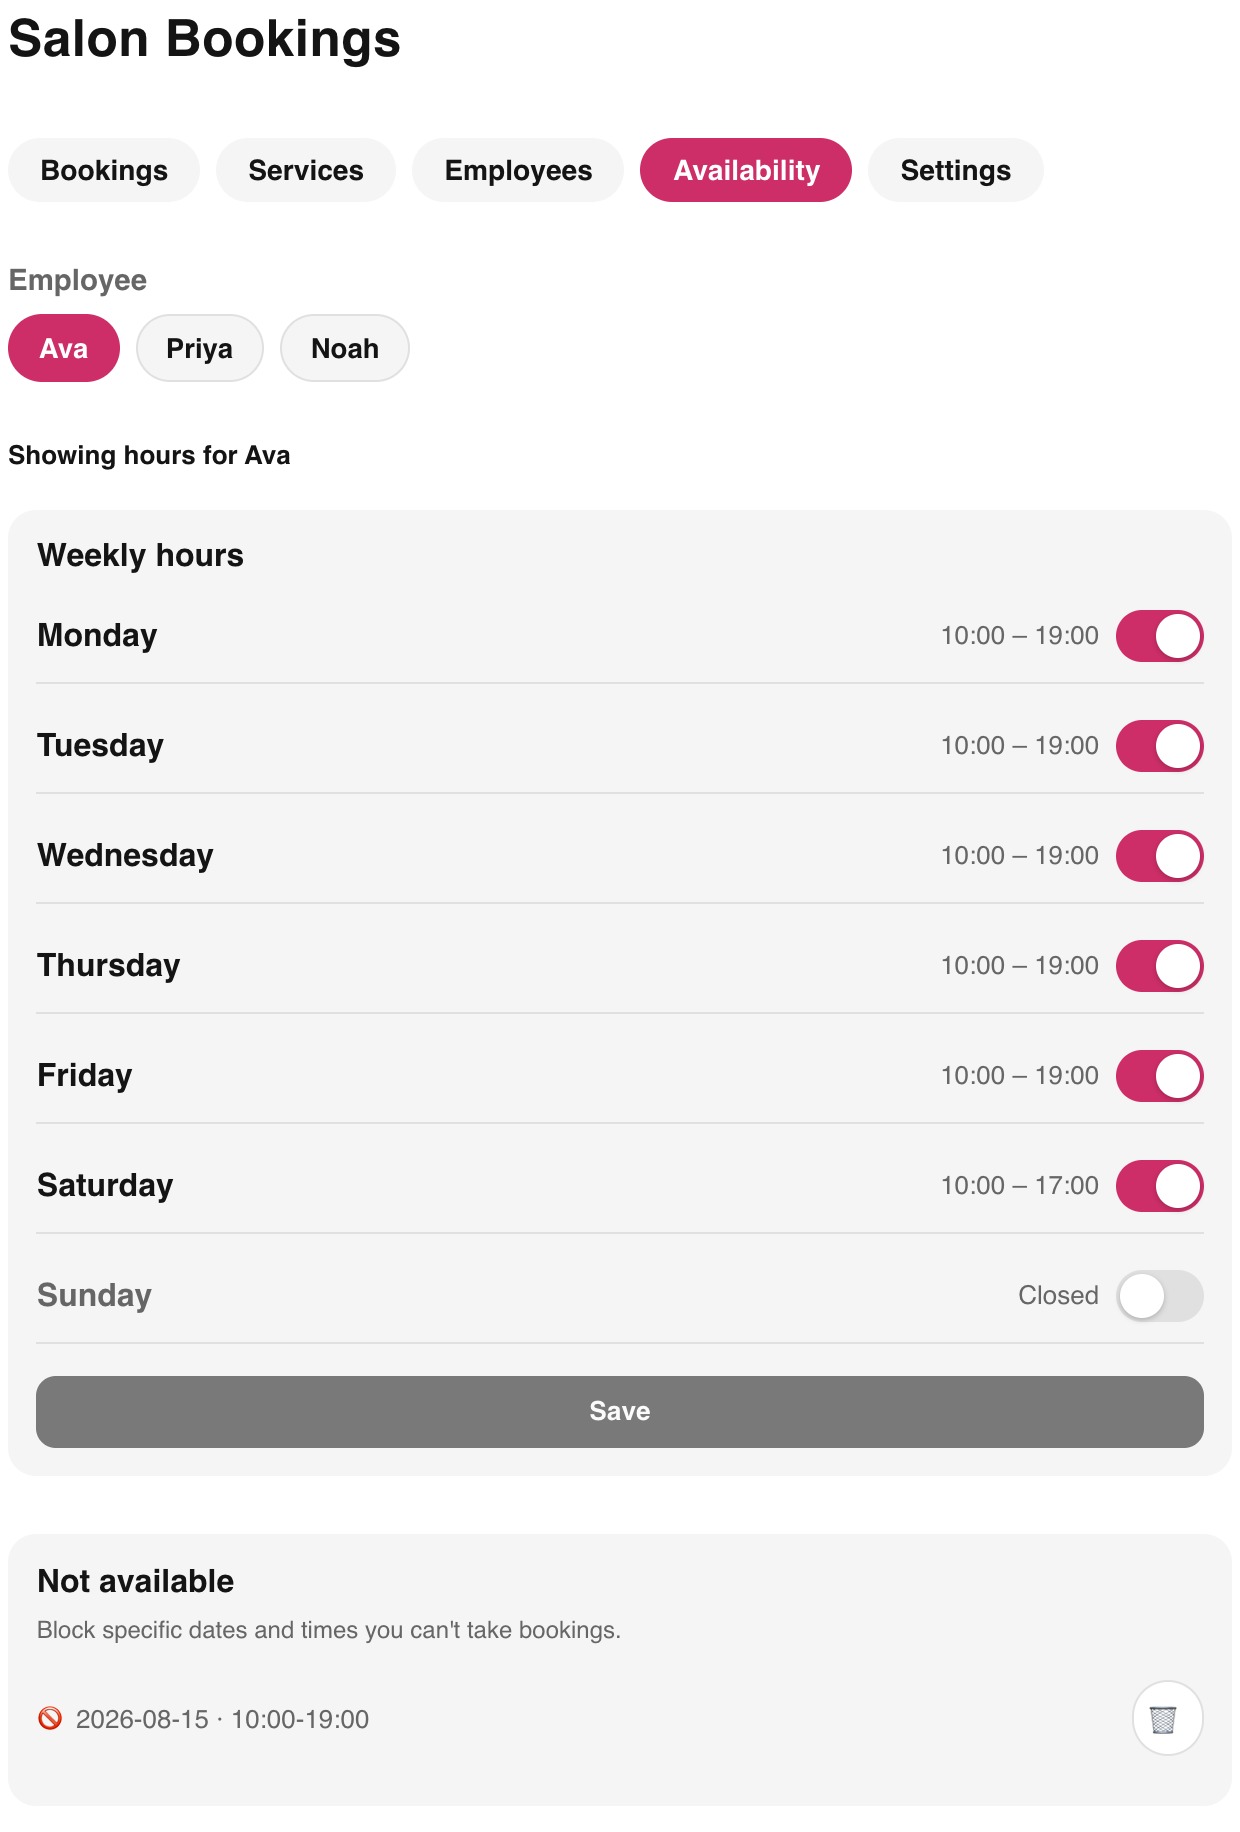
- 1Set weekly working hours per employee
Each technician can have their own schedule, so a part-time employee only shows open slots on the days they actually work.
- 2Add time off for specific dates
Holidays, vacations, or a single afternoon off, without touching that employee's regular weekly hours.
- 3Open an exception for extra hours if you need to
The same screen also lets you open up a normally-closed day, like a holiday rush weekend.
Step 4: Configure your booking settings
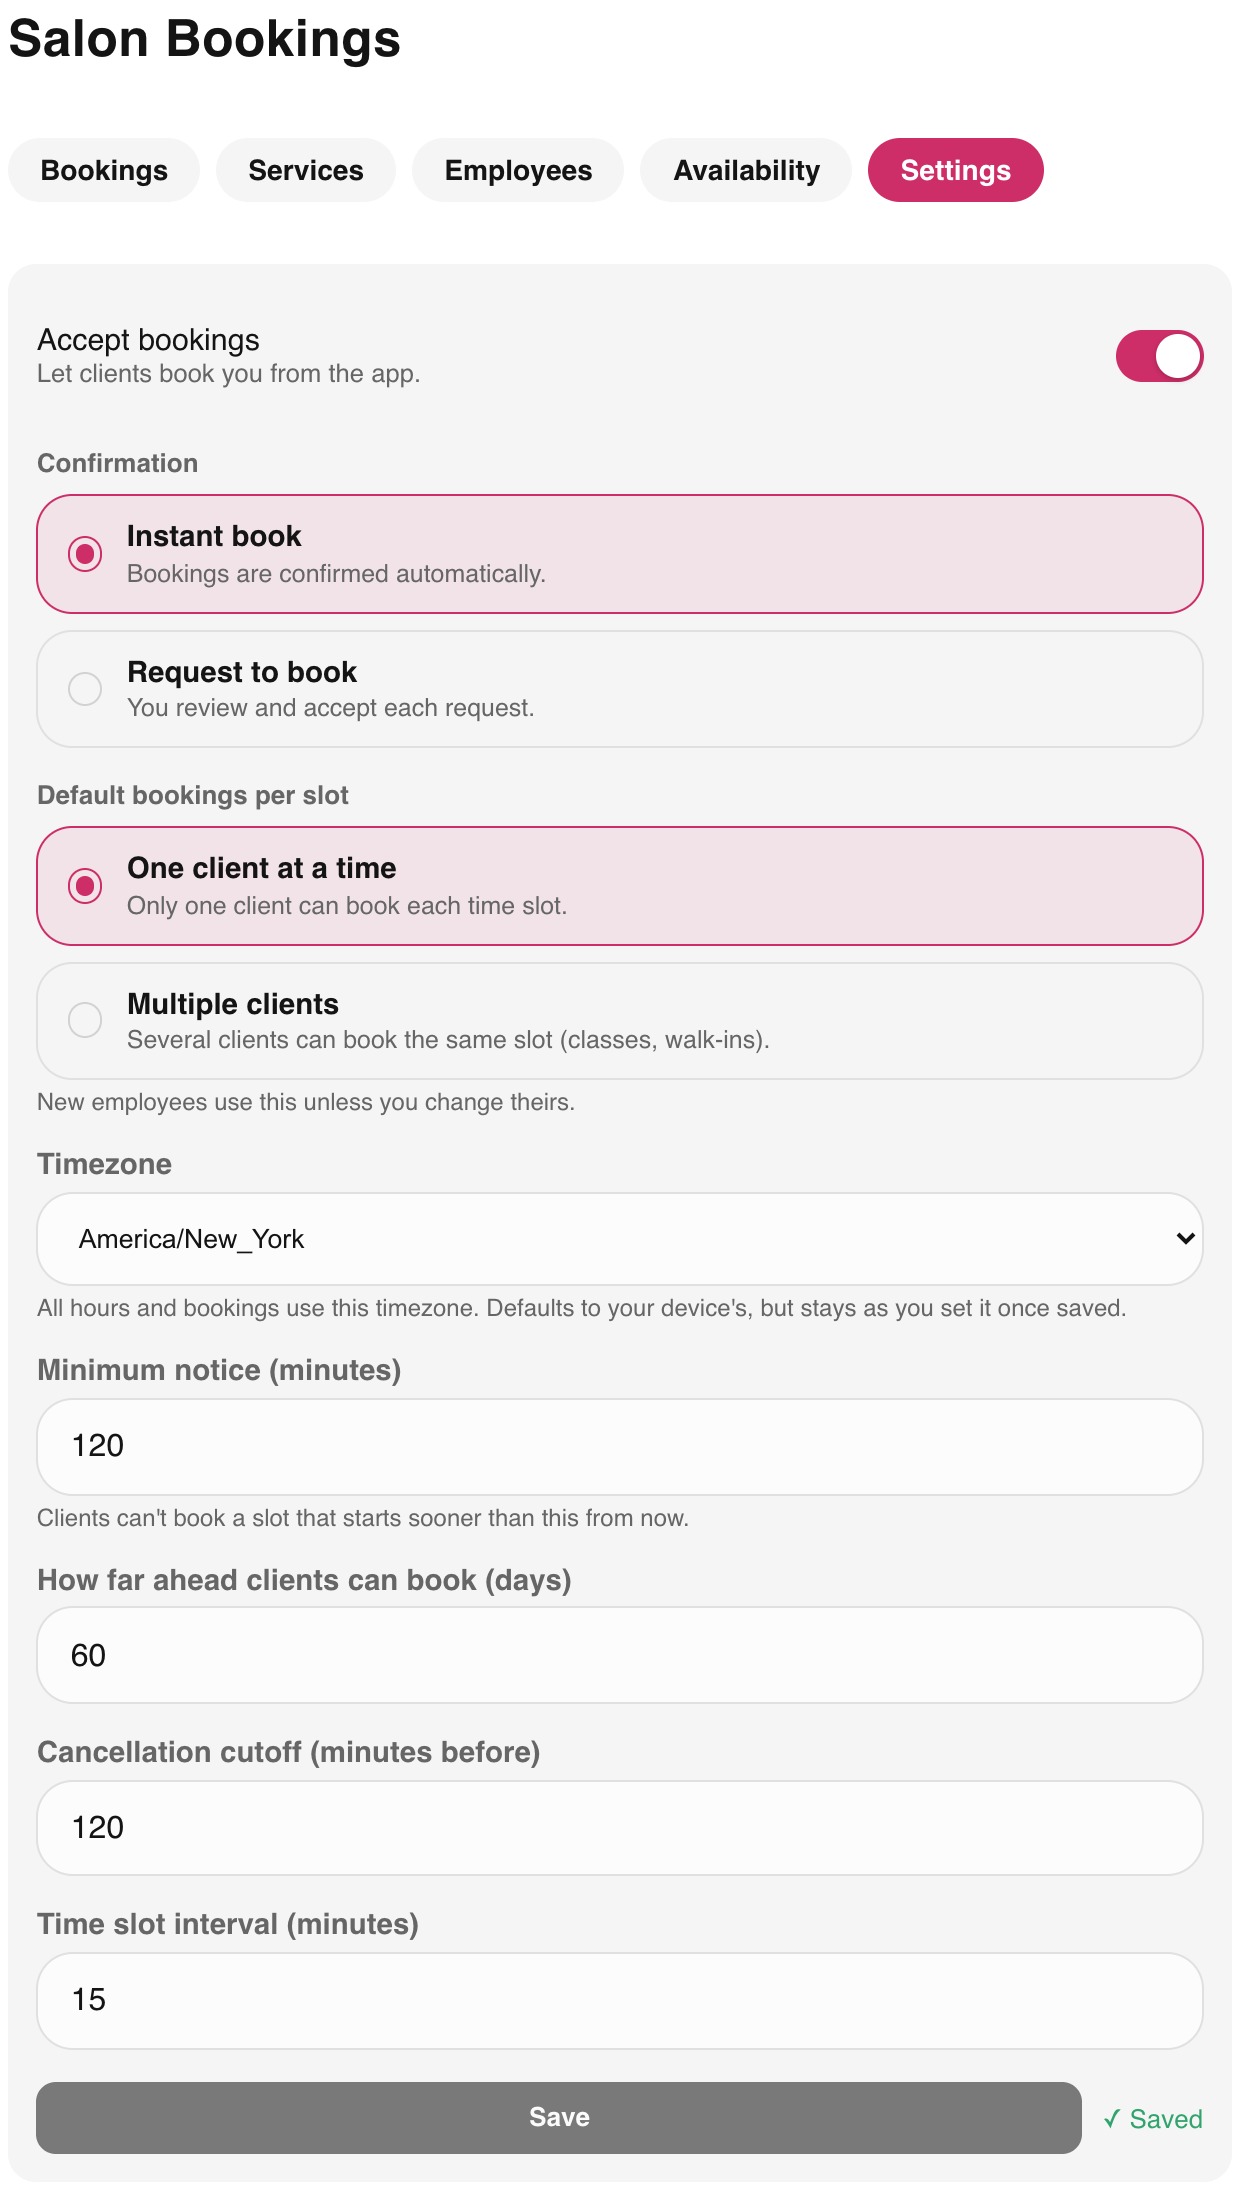
- 1Set your minimum notice
Clients can't book a slot that starts sooner than this from now, so last-minute walk-ins don't show up as a surprise booking.
- 2Set how far ahead clients can book
A shorter window keeps your calendar predictable; a longer one captures clients planning around an event.
- 3Set your cancellation cutoff
How close to the appointment a client can still cancel without having to call you directly.
- 4Choose instant booking or approval
Instant booking confirms automatically. Approval mode lets you review each request first, useful while you’re still trusting the system.
Step 5: Connect Google Calendar (optional)
If your technicians already keep their lives in Google Calendar, connect it. Each employee gets their own calendar, because availability belongs to the person, not the salon. A salon with one technician connects one calendar; a salon with three connects three.

- 1Open Employees and tap Edit on a team member
Scroll to the Google Calendar section at the bottom of their editor.
- 2Tap Connect Google Calendar
Sign in with that employee's own Google account, not the salon owner's, and allow calendar access. If they aren't next to you, they can do this step on their own device while signed in to the salon account.
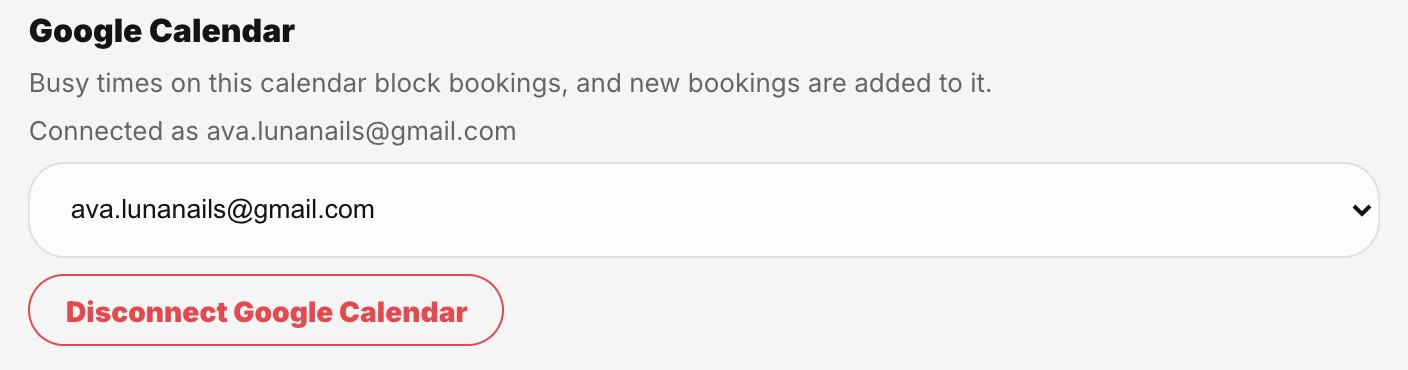
- 3Check which calendar is being watched
Their primary calendar is selected automatically. Use the picker to choose a different one, for example a dedicated "Work" calendar.
- 4Repeat for every employee who uses Google Calendar
Employees without a connection keep working exactly as before, using only the hours you set on the Availability tab.
What the sync does
- Busy times in Google Calendar block those slots on your booking page within about a minute, so a dentist appointment or a school pickup never gets double-booked.
- Every confirmed booking appears as an event in that employee’s Google Calendar, and it moves or disappears when the booking is rescheduled or cancelled.
- Nailterest only reads when someone is busy. Event titles, locations, and guests stay private.
- You can disconnect at any time from the same screen, and access is revoked at Google straight away.
Turn bookings on
Once your services, team, and availability are in place, go to Settings and switch "Accept bookings" on. Your profile immediately shows a Book button, and your public booking link works for clients who don’t have an account yet, no app download or sign-up required on their end.
Frequently asked questions
Do clients need the Nailterest app to book me?
No. Every salon gets a public booking link that works in any browser. Clients who already use the app can also book straight from your profile.
Can I require my approval before a booking is confirmed?
Yes. Switch your booking settings from instant booking to approval mode, and every request waits for you to accept or decline it first.
What happens if I need to close for a day I didn’t plan for?
Add a time-off exception for that date on the Availability tab. Existing bookings stay as they are, and no new ones can be made for that day.
Does Nailterest work with Google Calendar?
Yes. Each employee can connect their own Google Calendar from their edit screen. Busy times in Google block booking slots, and Nailterest bookings show up as events in their calendar. Only busy and free times are read, never event details.
Ready to set this up for your salon?
Create a free Nailterest account to get started.